O3A Panner - Two Channel
Host Support
| Host Type | Support |
|---|---|
| AAX | Yes |
| VST2 | Yes |
Audio
| Channels | Content | |
|---|---|---|
| Input | 2 | Stereo |
| Output | 16 | O3A |
Controls
Description
This O3A panner takes two mono sound sources and places them in particular directions in a 3D O3A mix.
It can also be used as a simple way to upmix stereo to O3A. However, we do not particularly recommend you do this except for fairly narrow angles because a large "hole" can appear between the two sources. For a more thorough handling of material that was originally panned to stereo you wish to look at the O3A Upmixer - Stereo plugin.
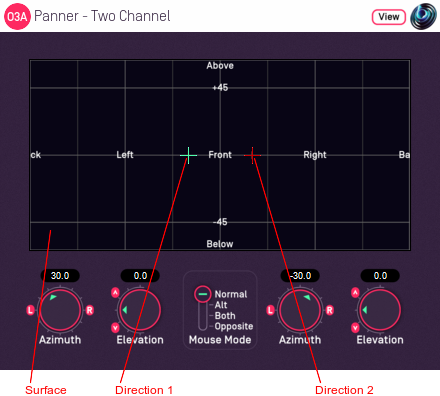
There are azimuth and elevation dials for each of the two sources. Each works the same way as the controls in the mono version. There is a control surface which can be used to visualise the current directions for the two sources, indicated by the green/blue and red crosshairs. These can be changed by clicking with the mouse, using the left mouse button for the first source and the right mouse button for the second. If you do not have a right mouse button, or are using a touch screen, you can hold down the 'Alt' key and press the main button instead. You can also move both sources around together using the 'Shift' key.
If pressing keys on the keyboard is inconvenient, there is a mouse mode slider on screen which can be used instead.
| Mouse Mode | Key(s) Held | Function |
|---|---|---|
| Norm | Normal operation. Left click to move the first source, right click to move the second source. | |
| Alt | Alt | Flips the source moved when the control surface is clicked, so a left click moves the second source rather than the first (and vice versa). Typically used to select the second source on a mouse with only one button. |
| Both | Shift | Changes the control surface so that movements of the mouse shift both sources. |
| Opp | Alt & Shift | Changes the control surface so that movements of the mouse shift both sources, but the sources move in opposite directions. |
There are labels on the control surface to help you find left, right, above etc. However, if this still does not make any sense, you might want to see our page on the O3A Visualiser which lays out its viewing region in the same way.
The plugin is available in the O3A Core plugin library.
View Support
When used with O3A View Sync from the O3A View library, this plugin can be connected to the separate View or ViewVR applications.
When this option is available, a 'View' button appears at the top right of the plugin's user interface.
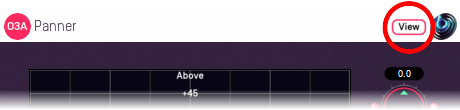
When this is pressed, the plugin is connected to the View or ViewVR application and is displayed there.
| View Support | ViewVR Support |
|---|---|
The current panner directions are shown using green/blue and red crosses, similarly to the plugin display. Point at one and hold the left mouse button to select it. Then, drag to set its azimuth and elevation. | The current panner directions are shown using green/blue and red beams and crosses, similarly to the plugin display. Each VR controller moves one panner direction and the controllers show short green/blue and red beams to indicate which is which. Hold a VR controller trigger to set an azimuth and elevation. |
Controls
Controls: Azimuth 1 and 2 and Elevation 1 and 2
Azimuth is the horizontal angle, between -180 to +180 degrees, measured anticlockwise (left) from the front. Elevation is a vertical angle between -90 and +90 degrees, measured with positive upwards and 0 on the horizontal.
For instance, the direction for azimuth +90 and elevation +45 can be found by turning 90 degrees to the left and then looking up by 45 degrees.
Azimuth 1 and Elevation 1 control the location used to pan the first source (which is shown in green/blue on the control surface). Azimuth 2 and Elevation 2 control the location used to pan the first source (which is shown in red).
Control: Mouse Mode
The mouse mode slider in the middle at the bottom of the screen determines the mouse mode used when the control surface is clicked. They are an alternative to use of the Alt and Shift keys. See the table above for details on how these options affect operation.
- O3A Beamer
- O3A Colourizer
- O3A Decoder - 5.1 Basic
- O3A Decoder - FuMa
- O3A Decoder - Mono
- O3A Decoder - O1A
- O3A Decoder - O2A
- O3A Decoder - Stereo
- O3A Flare
- O3A Gain
- O3A Injector - FuMa
- O3A Injector - O1A
- O3A Injector - O2A
- O3A Look
- O3A Meter
- O3A Meter - Signal
- O3A Panner
- O3A Panner - Classic
- O3A Panner - Eight Channel
- O3A Panner - Hemisphere
- O3A Panner - Large
- O3A Panner - Two Channel
- O3A Rotation
- O3A Spatial Delay
- O3A Virtual Microphone
- O3A Visualiser
- O3A Visualiser - Hemisphere