O3A Panner 16 and 32
Host Support
O3A Panner 16
| Host Type | Support |
|---|---|
| AAX | Yes, input mapped to third order ambisonics |
| VST2 | Yes |
O3A Panner 32
| Host Type | Support |
|---|---|
| AAX | No |
| VST2 | Yes |
Audio
O3A Panner 16
| Channels | Content | |
|---|---|---|
| Input | 16 | 16 channels of mono (mapped to third order ambisonics for AAX) |
| Output | 16 | O3A |
O3A Panner 32
| Channels | Content | |
|---|---|---|
| Input | 32 | 32 channels of mono |
| Output | 16 | O3A |
Controls
- Azimuth 1 - 16 or 1 - 32
- Elevation 1 - 16 or 1 - 32
- Gain 1 - 16 or 1 - 32
- Cutoff 1 - 16 or 1 - 32
- Mute 1 - 16 or 1 - 32
- Solo 1 - 16 or 1 - 32
Description
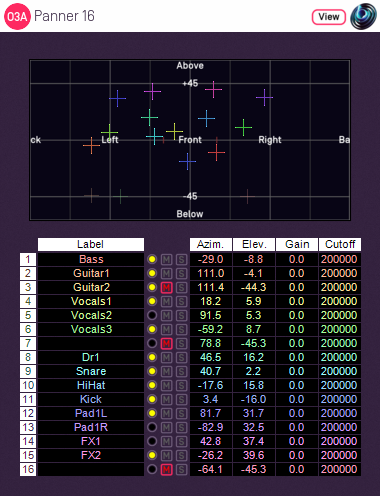
These O3A panners takes 16 or 32 mono sound sources and place them in particular directions in a 3D O3A mix.
There are azimuth and elevation dials for each of the sources. These work the same way as the controls in the standard single-channel panner.
There is a control surface which can be used to visualise the current directions for the sources, indicated by coloured crosshairs. These can be moved around by dragging with the mouse.
There are labels on the control surface to help you find left, right, above etc. However, if this still does not make any sense, you might want to see our page on the O3A Visualiser which lays out its viewing region in the same way.
Each channel has a gain control and a -6dB/octave low pass filter which can be used to simulate distance and occlusion effects. A signal indicator lights up when a channel is active and has an input signal.
Text can be entered into channel labels to help you keep track of which channel is which. With this many channels, this is well worth doing! These labels are also shown when using this plugin's View support.
Reaper Note
If you are using this panner with Reaper, it is fairly easy to set up the individual mono source inputs as subtracks of the track on which the panner is set.
On the routing panel for each subtrack, set the "Parent Channels" to send to the relevant pair of inputs in this plugin and then pan hard left or right depending on whether this should be an odd or even input. Set this panner plugin as the first effect on the parent track and check the routing using the solo button for the source.
Pro Tools Note
For compatibility with AAX, the 16 channel version of this plugin misuses the third order ambisonic AAX stem format to create an input with 16 channels. As a result, it will show up in plugin lists on third order ambisonic buses, which is not strictly correct as its input is not really ambisonic. You will probably want to create one or more third order ambisonic buses to use this plugin. Obviously, it should not be used to process real third order ambisonic streams!
The 32 channel version of this plugin is not compatible with Pro Tools.
Use
This plugin has a large number of control parameters and the display does not include individual dials for them all; values need to be entered as numbers. Panning can be controlled using the control surface, but this can become quite cluttered. If you want a plugin similar to this one with a similar layout but with a more manageable number of channels, you may wish to consider O3A Panner - Eight Channel.
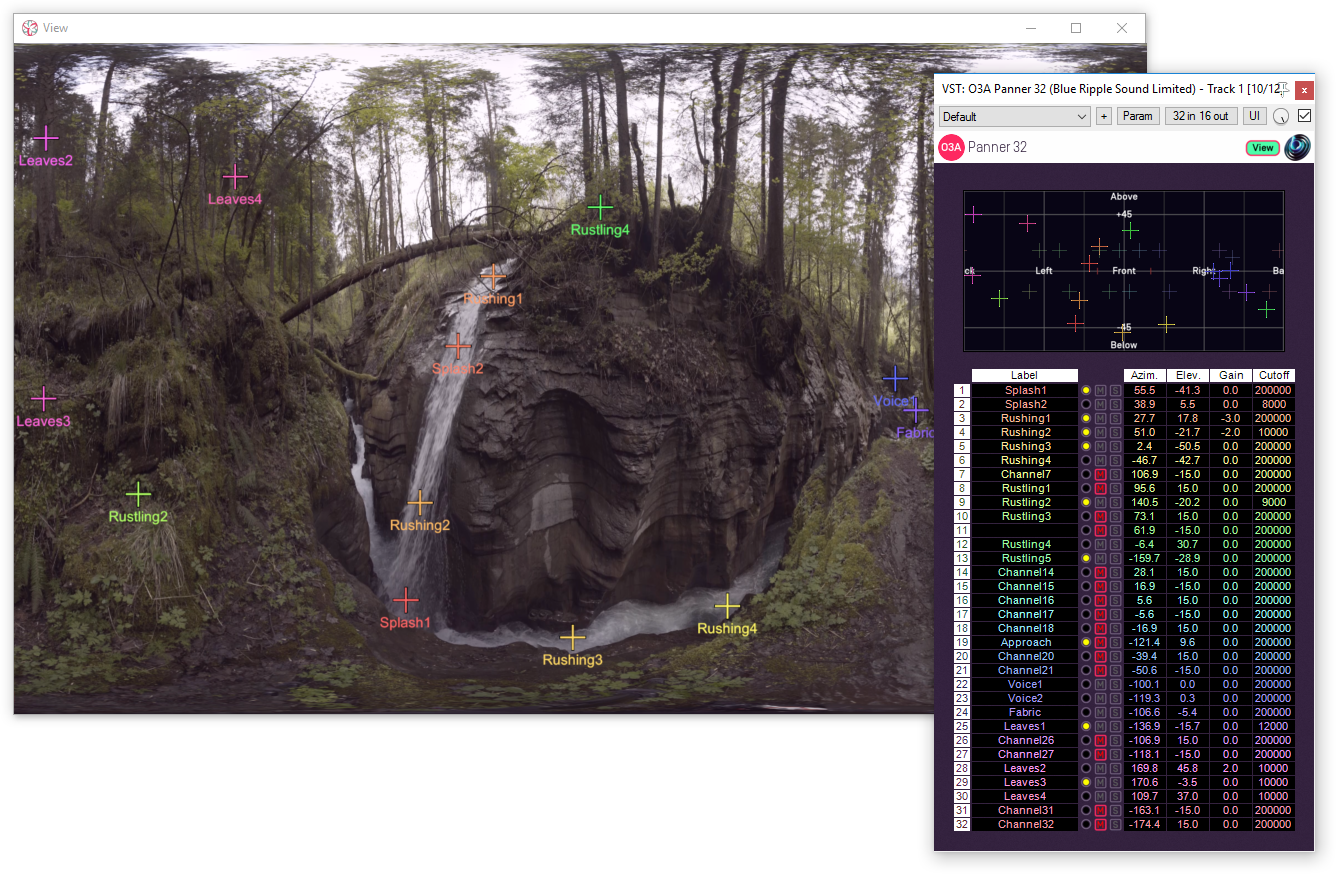
However, this plugin comes into its own when it is used with O3A View's separate View applications. Here, channels be overlayed onto a much larger panning surface, potentially with video, and potentially in VR.
The plugin is available in the O3A View plugin library.
View Support
When used with O3A View Sync from the O3A View library, this plugin can be connected to the separate View or ViewVR applications.
When this option is available, a 'View' button appears at the top right of the plugin's user interface.
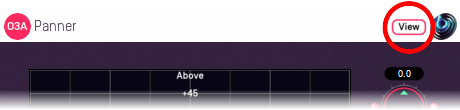
When this is pressed, the plugin is connected to the View or ViewVR application and is displayed there.
| View Support | ViewVR Support |
|---|---|
The current panner directions are shown using colour-coded crosses and labels, similarly to the plugin display. Point at one and hold the left mouse button to select it. Then, drag to set its azimuth and elevation. | The current panner directions are shown using colour-coded beams, crosses and labels, similarly to the plugin display. Point at one with a VR controller and the controller will indicate the label of the source pointed at. Then, hold the VR controller trigger to select it and move the controller to set its azimuth and elevation. |
Controls
Controls: Azimuth 1 - 16 or 1 - 32 and Elevation 1 - 16 or 1 - 32
Azimuth is the horizontal angle, between -180 to +180 degrees, measured anticlockwise (left) from the front. Elevation is a vertical angle between -90 and +90 degrees, measured with positive upwards and 0 on the horizontal.
For instance, the direction for azimuth +90 and elevation +45 can be found by turning 90 degrees to the left and then looking up by 45 degrees.
It may help to experiment with the control surface to get used to this way of doing things.
Azimuth and Elevation can also be changed by dragging the relevant source on the control surface.
Controls: Gain 1 - 16 or 1 - 32
Each panned source has its own gain control, with a range from -60dB to +12dB.
Controls: Cutoff 1 - 16 or 1 - 32
Each panned source has its own low pass filter. The filter is a relatively subtle -6dB/octave filter with -3dB at the cutoff frequency provided. This is intended primary for use in simulation of distance or acoustic occlusion.
Controls: Mute 1 - 16 or 1 - 32 and Solo 1 - 16 or 1 - 32
Each panned source has its own mute and solo switch. These have the usual meanings and solo overrides mute.